> ## Documentation Index
> Fetch the complete documentation index at: https://cockroachlabs.mintlify.site/llms.txt
> Use this file to discover all available pages before exploring further.
# Build a GraphQL Application Using Hasura
export const InternalLink = ({version, path = "", children, ...props}) => {
let detectedVersion = version || "stable";
if (typeof window !== 'undefined' && !version) {
const match = window.location.pathname.match(/\/docs\/([^/]+)/);
if (match) {
detectedVersion = match[1];
}
}
const normalizedPath = path.startsWith("/") ? path.slice(1) : path;
return
{children}
;
};
This tutorial shows you how to create a GraphQL application using [Hasura Cloud](https://cloud.hasura.io/) and CockroachDB Standard.
The Hasura GraphQL Engine creates [GraphQL](https://graphql.org/) schemas and resolvers based on the tables and views in your CockroachDB cluster, allowing you to submit GraphQL queries to access and manipulate your data.
Hasura GraphQL Engine v2.16 and later supports CockroachDB v22.2 and later.
## Overview
This tutorial will show you how to configure a Hasura project with a CockroachDB data source, allow connections to your CockroachDB cluster from Hasura Cloud, and create a table that is then used with Hasura GraphQL Engine to retrieve and modify data.
## Before you begin
Before you start this tutorial, you need:
* An existing CockroachDB Cloud cluster, running CockroachDB v22.2 or later.
* A [Hasura Cloud account](https://hasura.io/docs/latest/getting-started/getting-started-cloud).
## Create a new project in Hasura Cloud
1. In the Hasura Cloud console, select **Projects**, then click **New Project**.
2. In the **Create Project** panel select the cloud infrastructure provider and region.
The cloud infrastructure provider and region should match your cluster. For example, if you created a CockroachDB Standard cluster in GCP's `us-east1` region, choose a GCP region closest to `us-east1`.
3. Click **Create Free Project**.
### Add environment variables to your project
You will store your cluster root certificate and connection string in your Hasura project's environment variables. Storing this connection information in environment variables is considered a best practice.
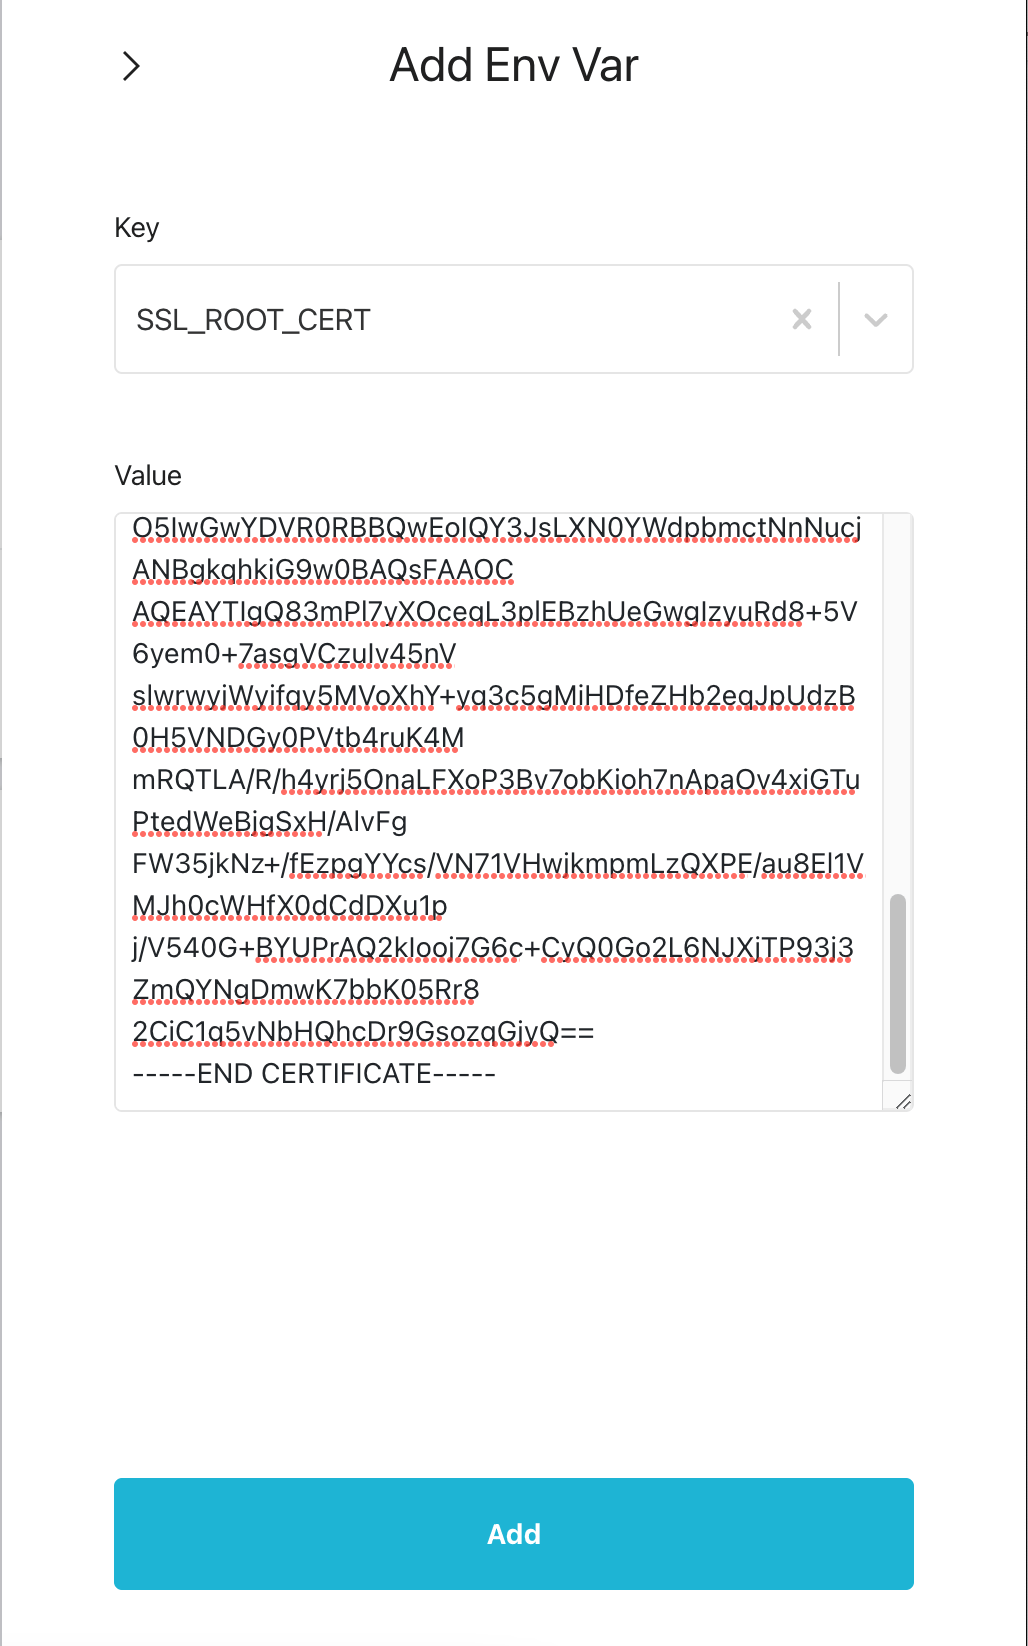
Create a `SSL_ROOT_CERT` environment variable for your cluster's CA cert.
1. Select **Env vars** in your project settings, and click **New Env Var**.
2. Under **Key** type `SSL_ROOT_CERT`, then press **Enter**.
3. Copy the contents of your cluster's CA certificate file you downloaded earlier.
For example, on Mac you can copy the contents of the CA certificate in a terminal using `pbcopy`:
```shell theme={"theme":{"light":"catppuccin-mocha","dark":"catppuccin-mocha"}}
pbcopy < $HOME/.postgresql/root.crt
```
4. Paste the contents of the CA certificate file under **Value**.
5. Click **Add**.
6. Select **Env vars** in your project settings, and click **New Env Var**.
7. Under **Key** type `SSL_ROOT_CERT`, then press **Enter**.
8. Copy the contents of your CockroachDB Standard cluster's CA certificate file you downloaded earlier.
For example, on Mac you can copy the contents of the CA certificate in a terminal using `pbcopy`:
```shell theme={"theme":{"light":"catppuccin-mocha","dark":"catppuccin-mocha"}}
pbcopy < $HOME/Library/CockroachCloud/certs/fake-puppy-ca.crt
```
9. Paste the contents of the CA certificate file under **Value**.
 10. Click **Add**.
Create a `CRDB_URL` environment variable to store the connection string.
1. Click **New Env Var**.
2. Under **Key** type `CRDB_URL`, then press **Enter**.
3. Paste the connection string for your cluster you copied earlier. Add your SQL user password if necessary to the connection string.
4. Remove the `sslmode` and `sslrootcert` query parameters from the end of the connection string. You will add the SSL settings later.
For example, if your connection string in the CockroachDB Cloud console is:
```text theme={"theme":{"light":"catppuccin-mocha","dark":"catppuccin-mocha"}}
postgresql://maxroach:NotAGoodPassword@fake-puppy-595.g95.cockroachlabs.cloud:26257/defaultdb?sslmode=verify-full
```
You would modify the connection string to:
```text theme={"theme":{"light":"catppuccin-mocha","dark":"catppuccin-mocha"}}
postgresql://maxroach:NotAGoodPassword@fake-puppy-595.g95.cockroachlabs.cloud:26257/defaultdb
```
5. Click **Add**.
### Create a Data Source in Hasura Cloud
1. In the overview page in Hasura Cloud, select **Projects**, find the project you created earlier, and click **Launch Console**.
2. Click **Data** in the console header to open the **Data Manager**.
3. Click **Connect Database**.
4. In the **Connect Existing Database** tab configure the connection to your cluster.
1. Under **Database Display Name** type a name for your connection. Your cluster name is a good option. For example, `fake-puppy`.
2. Set **Data Source Driver** to **CockroachDB**.
3. Select **Environment Variable**, then enter `CRDB_URL` in the **Environment Variable** input box.
10. Click **Add**.
Create a `CRDB_URL` environment variable to store the connection string.
1. Click **New Env Var**.
2. Under **Key** type `CRDB_URL`, then press **Enter**.
3. Paste the connection string for your cluster you copied earlier. Add your SQL user password if necessary to the connection string.
4. Remove the `sslmode` and `sslrootcert` query parameters from the end of the connection string. You will add the SSL settings later.
For example, if your connection string in the CockroachDB Cloud console is:
```text theme={"theme":{"light":"catppuccin-mocha","dark":"catppuccin-mocha"}}
postgresql://maxroach:NotAGoodPassword@fake-puppy-595.g95.cockroachlabs.cloud:26257/defaultdb?sslmode=verify-full
```
You would modify the connection string to:
```text theme={"theme":{"light":"catppuccin-mocha","dark":"catppuccin-mocha"}}
postgresql://maxroach:NotAGoodPassword@fake-puppy-595.g95.cockroachlabs.cloud:26257/defaultdb
```
5. Click **Add**.
### Create a Data Source in Hasura Cloud
1. In the overview page in Hasura Cloud, select **Projects**, find the project you created earlier, and click **Launch Console**.
2. Click **Data** in the console header to open the **Data Manager**.
3. Click **Connect Database**.
4. In the **Connect Existing Database** tab configure the connection to your cluster.
1. Under **Database Display Name** type a name for your connection. Your cluster name is a good option. For example, `fake-puppy`.
2. Set **Data Source Driver** to **CockroachDB**.
3. Select **Environment Variable**, then enter `CRDB_URL` in the **Environment Variable** input box.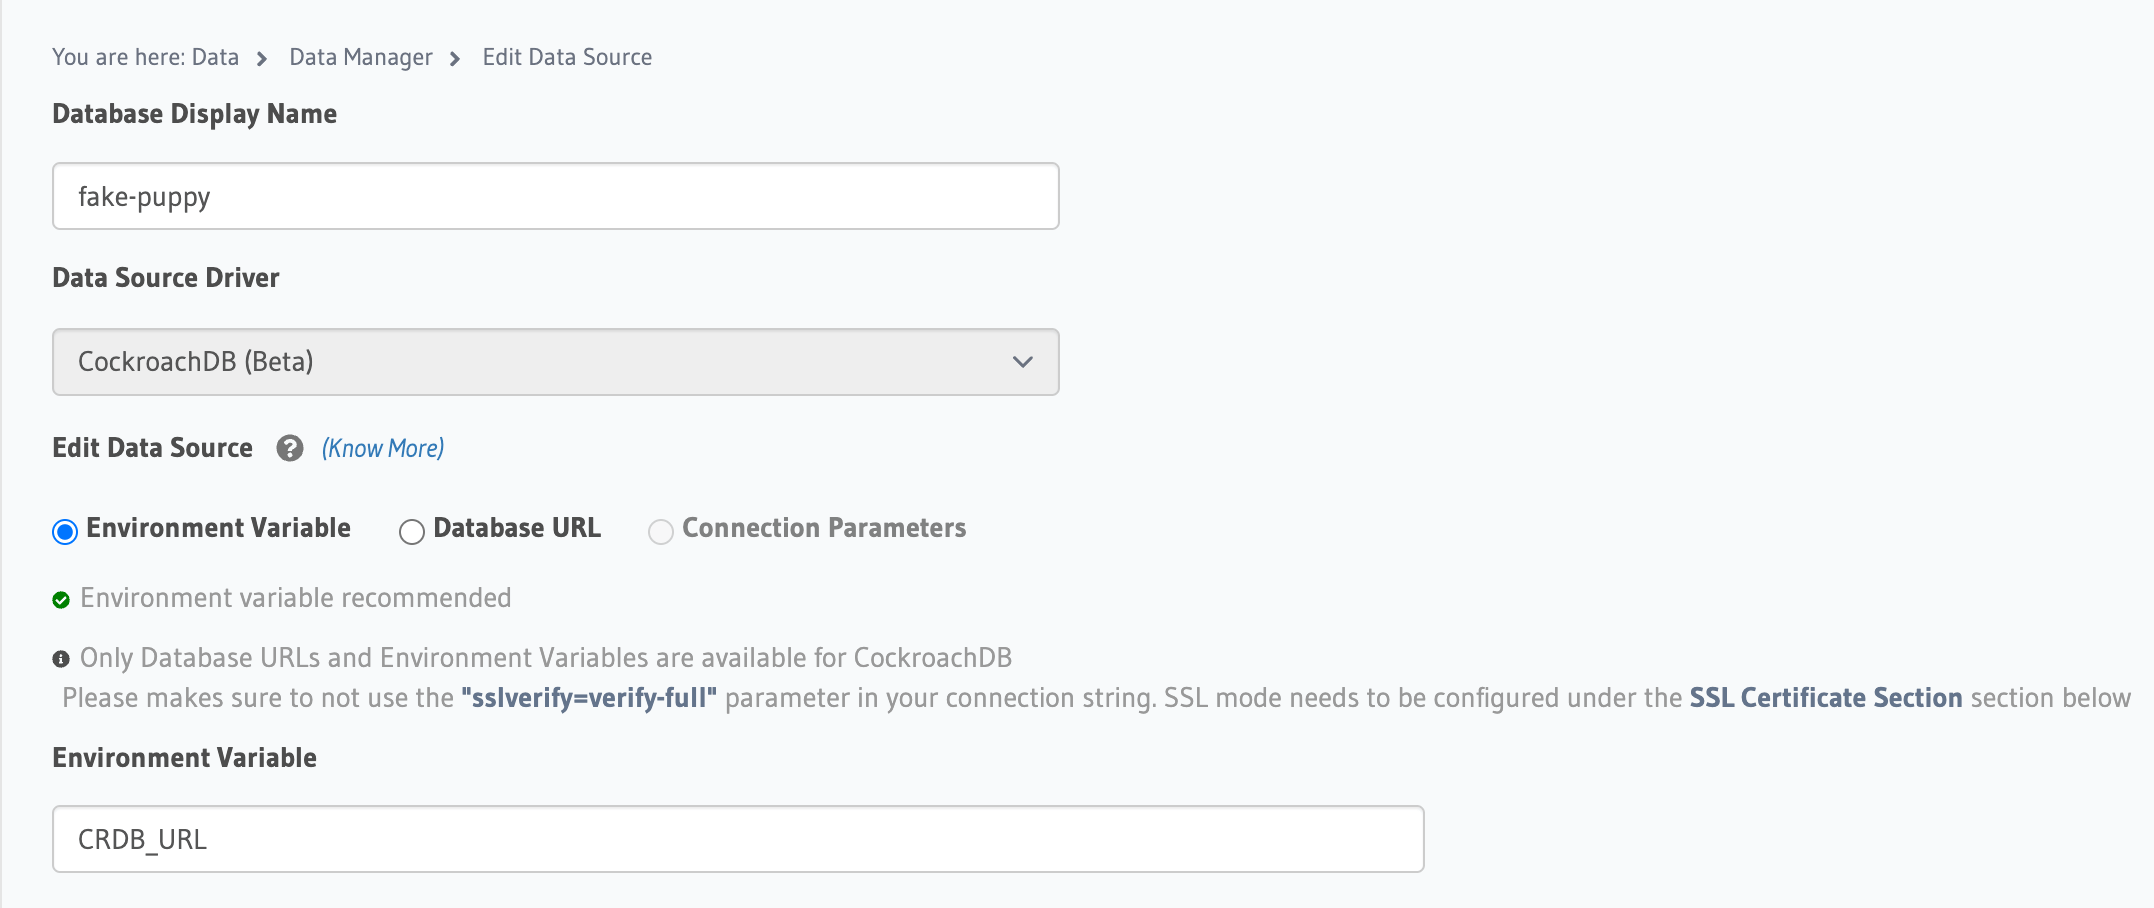 5. Expand **Connection Settings**, then expand **SSL Certificates Settings** and set **SSL Mode** to `verify-full`.
6. Enter `SSL_ROOT_CERT` under **SSL Root Certificate**, the environment variable you configured earlier.
7. Click **Connect Database**.
## Add the Hasura Cloud network to your cluster allowlist
Your CockroachDB Standard cluster needs to be configured to allow incoming client connections from Hasura Cloud.
1. In the Hasura Cloud overview page select **Projects**, then click the **Config** icon for your project.
5. Expand **Connection Settings**, then expand **SSL Certificates Settings** and set **SSL Mode** to `verify-full`.
6. Enter `SSL_ROOT_CERT` under **SSL Root Certificate**, the environment variable you configured earlier.
7. Click **Connect Database**.
## Add the Hasura Cloud network to your cluster allowlist
Your CockroachDB Standard cluster needs to be configured to allow incoming client connections from Hasura Cloud.
1. In the Hasura Cloud overview page select **Projects**, then click the **Config** icon for your project.
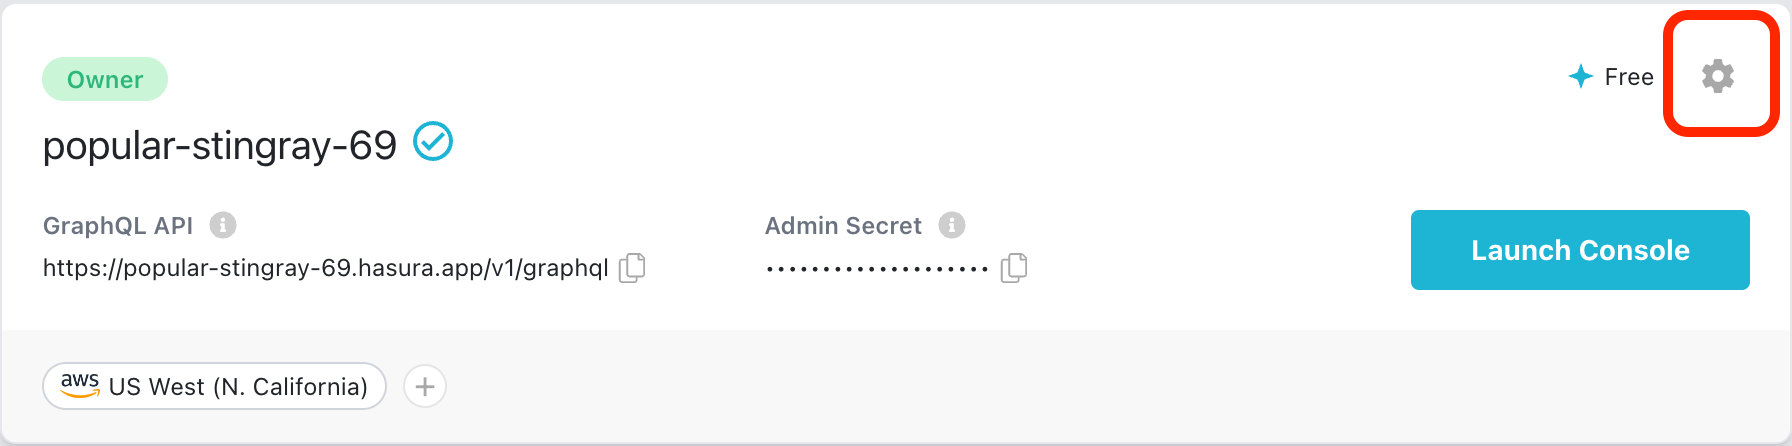 2. In the **General** section, copy the IP address listed under **Hasura Cloud IP**.
3. In the CockroachDB Cloud console select your cluster, click **Networking**, then **Add Network**.
4. In the **Add Network** dialog, set **Network name** to `Hasura Cloud`.
5. Under **Network**, select **New Network**. Paste the IP address of your Hasura Cloud instance you copied earlier.
6. Check **CockroachDB Client to access the databases**, then click **Apply**.
## Create a table in your CockroachDB cluster
1. Connect to your cluster using the SQL client.
```shell theme={"theme":{"light":"catppuccin-mocha","dark":"catppuccin-mocha"}}
cockroach sql --url "{connection string}"
```
Where
2. In the **General** section, copy the IP address listed under **Hasura Cloud IP**.
3. In the CockroachDB Cloud console select your cluster, click **Networking**, then **Add Network**.
4. In the **Add Network** dialog, set **Network name** to `Hasura Cloud`.
5. Under **Network**, select **New Network**. Paste the IP address of your Hasura Cloud instance you copied earlier.
6. Check **CockroachDB Client to access the databases**, then click **Apply**.
## Create a table in your CockroachDB cluster
1. Connect to your cluster using the SQL client.
```shell theme={"theme":{"light":"catppuccin-mocha","dark":"catppuccin-mocha"}}
cockroach sql --url "{connection string}"
```
Where {'{connection string}'} is the connection string for your cluster you copied earlier.
2. In the SQL client, create an `accounts` table.
```sql theme={"theme":{"light":"catppuccin-mocha","dark":"catppuccin-mocha"}}
CREATE TABLE IF NOT EXISTS accounts (
id UUID PRIMARY KEY DEFAULT gen_random_uuid(),
balance INT8
);
```
3. Insert some data into the `accounts` table.
```sql theme={"theme":{"light":"catppuccin-mocha","dark":"catppuccin-mocha"}}
UPSERT INTO accounts (balance) VALUES (1000), (250);
```
This will create two accounts, one with \$1000 and another with \$250.
## Track the `accounts` table in the Hasura Cloud Data Manager
1. In the Hasura Cloud Data Manager click `public` under your connection name.
2. Click the **Track All** button.
3. Click **Yes** when prompted to expose the table to the GraphQL API.
### Create a GraphQL query in the Hasura Cloud API Explorer
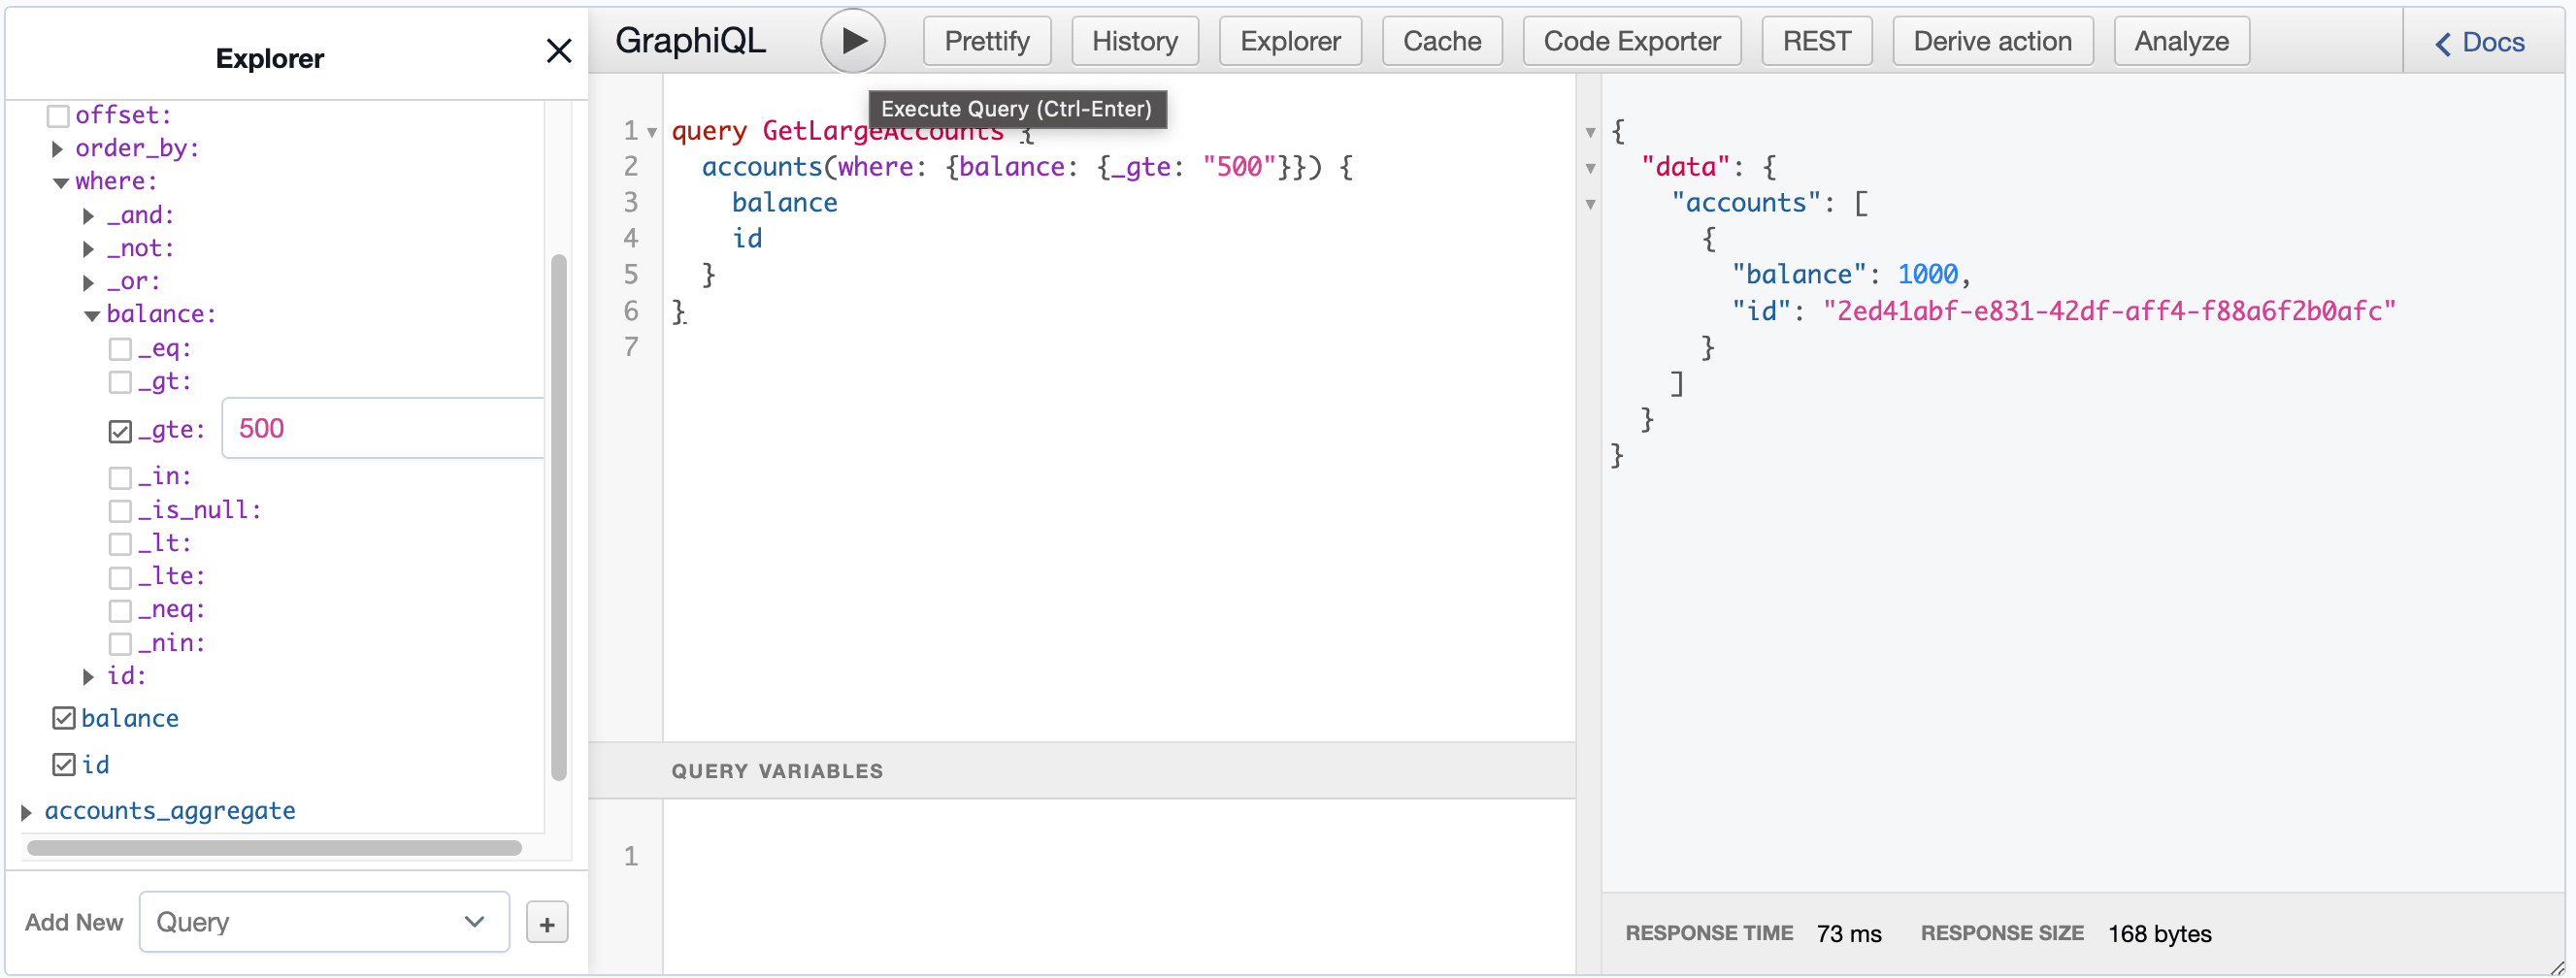
In the Hasura Cloud Explorer, you will see the `accounts` table. You can expand `accounts` to construct a GraphQL query against the `accounts` table.
For example, to create a query that finds all accounts with balances greater than or equal to \$500:
1. Enter `GetLargeAccounts` as the query name in the Explorer.
2. Expand `accounts` in the Explorer.
3. Check `balance` and `id`, then expand `where`, then `balance`.
4. Check `_gte` to create a "greater than or equal to" where clause for `balance`, then enter `500`.
This creates the following GraphQL query:
```graphql theme={"theme":{"light":"catppuccin-mocha","dark":"catppuccin-mocha"}}
query GetLargeAccounts {
accounts(where: {balance: {_gte: "500"}}) {
balance
id
}
}
```
Click the **Execute Query** button to run the `GetLargeAccounts` GraphQL query. The returned data should look like the following:
```json theme={"theme":{"light":"catppuccin-mocha","dark":"catppuccin-mocha"}}
{
"data": {
"accounts": [
{
"balance": 1000,
"id": "2ed41abf-e831-42df-aff4-f88a6f2b0afc"
}
]
}
}
```
 ## Next steps
Now that you have connected your cluster to Hasura GraphQL Engine, you can use the Explorer to create GraphQL queries to access and modify data in your cluster's tables. You can then use these queries in your application. For example, you can create [Hasura Actions](https://hasura.io/docs/latest/actions/index?utm_source=cockroachdb) that use these queries. See the [Hasura documentation](https://hasura.io/docs/latest/index?utm_source=cockroachdb) for detailed information on integrating and deploying Hasura in your applications.
## Next steps
Now that you have connected your cluster to Hasura GraphQL Engine, you can use the Explorer to create GraphQL queries to access and modify data in your cluster's tables. You can then use these queries in your application. For example, you can create [Hasura Actions](https://hasura.io/docs/latest/actions/index?utm_source=cockroachdb) that use these queries. See the [Hasura documentation](https://hasura.io/docs/latest/index?utm_source=cockroachdb) for detailed information on integrating and deploying Hasura in your applications.